
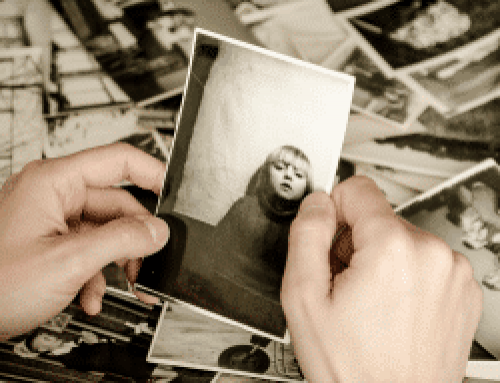
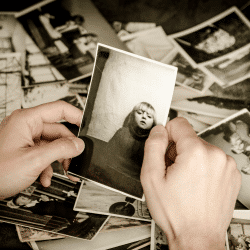
Why digitize the slides?
You probably have many boxes of 35mm slides from vacations and celebrations taking up the storage space in your closet, attic, or your basement or garage. What are you going to do with all those 35mm slides and 35mm slide carousels as the slide projector you have is worn out and cannot replace it as there are no more manufacturers of the projectors? Get those precious 35mm slides converted to digital format and enjoy the new and easy way to view before they deteriorate.
Once you have converted your slides to digital image files, you can:
- correct the brightness and faded color
- share your photos with friends and family via e-mail, web sites, and online galleries
- make high-quality prints
- create multi-media presentations with graphics and animation which you can put on a DVD and watch on TV or on your computer.
Below we have shared the best practice tips to digitize the 35mm slides:
Cleaning 35mm Slides
You really can’t effectively remove the dirt because you are mainly just moving the dust to the edges of your film. While we don’t recommend it, but in order to really clean the film to get the dirt off the film is to peal the cardboard carrier apart and take the film out and clean it that way. You will have to be very careful doing this or have new holders to put your slide film in afterwards.
If you are determined to clean your 35mm slides, we can recommend some methods and products that might work for you.
Microfiber Cloth Cleaning Method
This is the only cleaning method with simple light brushing with a very soft cloth that we recommend mostly. You have to be careful that there is nothing abrasive on the film or you will scratch it. It is good for brushing off loose dirt but don’t scrub with it.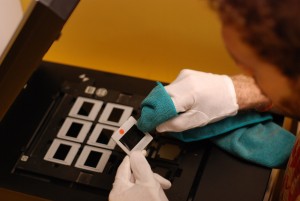
Liquid Film Cleaners
We don’t recommend using liquid film cleaner but if you are determined to do the slide cleaning with a liquid, never clean film with a water based cleaner or water. Use a cleaner made for film. Film cleaner can be applied with a clean soft cotton cloth with very light pressure to avoid creating scratches.
Photographic Emulsion Cleaner has been trusted by the world’s most prestigious photographers, labs, museums and publishers. It removes grease pencil, adhesive residue, finger oils, ball-point pen, fungus, smoke & soot damage, laser separation oil and most permanent inks.
Let us now look at how to convert your slides to digital using the scanners and the types of scanners available to convert your slides to digital.
How To Setup Your Slides In The Scanner
Flatbed scanner delivers the best balance of high resolution and consistent high quality images.
- How To Load Your Slides Onto The Scanner
Here’s what to do if you don’t want to scan the wrong side of a slide. Take out a slide, and bring it to a light source. Now, look at both sides of the slide.
You will notice that a slide will have two different sides. One side will be dull and bumpy. The other side will be smooth and glossy.
Side of the slide to be scanned
The bumpy/ dull side is called the “Matte Emulsion”. Emulsion is the “ink” that was used to “print” your image onto the slide film. That’s why it’s bumpy and dull.
The smooth/ glossy side is the “Reflective” side. This is the side to scan. So, once you found the glossy side, make sure it’s facing down towards the scanner’s window. The bumpy/ dull side is facing up, towards you.
- Make Sure Your Scanner Knows That You Are Scanning Slides
Load up your slides onto the scanner, and start the scanner’s software. First, the scanner is going to ask if you are scanning Film or Print. Film is your slides, negatives — anything that you can see through. Print includes photos, magazines, newspapers — anything that is solid.
- Ensure Slides are straight in Mounts
Making sure each 35mm slide or film strip is straight in its mount prior to scanning will save a lot of time straightening the digital images during the post-processing stage.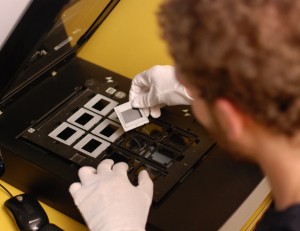
Slide Scan Resolution
As we have noted in the previous Scanning tips guide, it’s important to capture at a resolution appropriate to the goals of the digitization project. As a standard for 35mm slide and film collections, we recommend scanning to a minimum resolution of 3000dpi.
Digitizing at this resolution provides an optimum balance of capturing enough pixel information for detailed display on monitors, whilst keeping scanning times and costs reasonable. This resolution also allows the images to be blown up to larger sizes, minimizing the likelihood of any distortion appearing in the image.
How To Use The Scanner Software (Digital ICE) And Fix Your Slide Scan
Scanning isn’t perfect. That is the reason why every scanner comes with software like Digital ICE to help you repair your scans.
What is Digital ICE?
Digital ICE (Digital Image Correction and Enhancement) is a technology that is built into all of film scanning hardware to remove dust and scratches from a scanned image. It uses an infrared lamp to detect the dust locations on the surface of the film. The infrared beam passes through the clean portions of the film, but is blocked when encountering dust or dirt. Once a picture of the dust locations is formed, the scanning software then digitally paints over the detected areas leaving a cleaner image.
Limitations
Digital ICE only works on color films. Paper based products, such as photos or documents do not allow the infrared to pass through and therefore makes it useless. Black and white films containing silver halide also block the beam making it useless.
Why is it important to fix the scans?
Before you fix your scans, you need to know the 3 major problems.
Problem One: Too Much Dust, Debris, Scratches
When you look at your slide, you can’t see it. But when you blow it up, you are going to see every minute dust, scratch, and other debris which will ruin the image. 
Problem Two: Grain / Noise
The grain is because the old photo was taken long time ago using high quality film. Higher quality film has more detail and allows you to print at higher sizes (bigger than 4×6). We don’t need this noise as we are not printing.
Problem Three: Faded Colors
The scans of the slides come out too reddish/ Blue/ too light.
The technical term is called “Color Casting”. It may look like faded colors, but the fact is that the scanner is doing this. Even if you have a slide that was developed 3 minutes, you’ll still get color casting when you scan it.
If you look closely at a slide, you’ll notice the actual film is very glossy. This gloss is also picked up by the scanner and the result is color casting.
Why should you get the slides digitized from the professional service provider?
A professional service company does the scanning job at a much lower cost than the cost incurred in doing it by yourself. Below are the reasons for the same.
- High quality scan equipment is very expensive. So, the cost isn’t justified for home use.
- Scanning is a labor intensive work. It requires a dedicated resource to perform the job.
- Quality scanning work requires expertise in Photoshop, image properties, color enhancement techniques.
Using ScanCorner’s service, you not only save your valuable time and money incurred, but you also get a better quality scanning output. Image scanning is a one-time activity. So, go for the best quality. Your precious memories deserve the best.
Please follow the link for labelling and packaging tips: http://test.scancorner.in/packagingtips_slides


Leave A Comment