
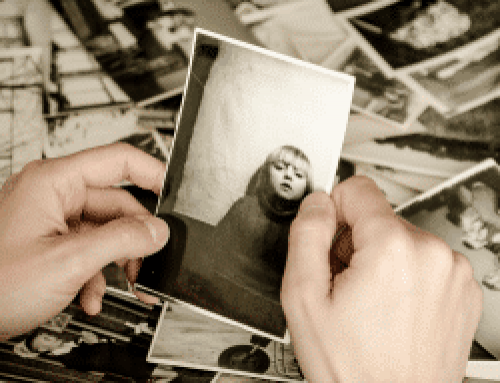
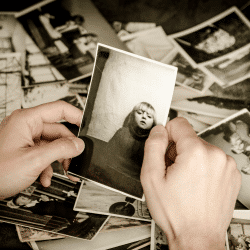
WHY SCAN?
Chances are you have a stack of photo albums, negatives and slides change color and fade with time due to collection of dust and exposure to light. Having your photos, negatives and slides digitized protects them from being lost or damaged and you can cherish the good old memories for lifetime. Scanning photos opens up so many doors to how you enjoy your memories with the easy to use digital Sharing options.
Photos and Slides Fade
Color photos stored in ideal conditions will fade over time. The primary cause of fading is due to exposure to light. Another main cause is simply the way the photo was developed. The material used to create the photo has a limited lifespan and will start to fade.
Photos Change Color
The chemical reaction used to produce the old photos on the paper is not permanent and the photo starts to break down and lose its color over time. The most common reaction is a yellow haze or a reddish haze that develops over the photo. The scanning process utilizes software that attempts to correct this problem, thus bringing back the natural color of the photo in digital form.
Photos and Slides Have Dust and Scratches
Slides are particularly easy to scratch and always have some amount of dust on them. By scanning, minor dust and scratches from the final image can be eliminated easily to obtain clearer image resulted due to digital ICE procedure.
Keep Your Photos and Slides Safe From Disaster
Unfortunately the precious photos and slides stored in boxes or albums are subjected to possible fire, water or smoke damage, animals, pets, theft, or simply misplacing them. Scanning them to digital format allows you to have all your photos and slides on a DVD and having them on your computer.
For Gifting and Sharing with Friends and Family
Once you get your photos and slides on a DVD, you can share them with family members. You can also have the images on a USB which you can simply plug into your computer or HDTV, which will give access to the digital images. Social media websites such as Facebook, Twitter, Google+ are making it easier than ever to share your photos with friends and family. Scanning your photos and slides lets you share those precious memories easily and quickly. These digital files will also make great gifts which you can make use of to create photo books, calendars and similar wonderful gifts for a family member or friend.
CHOOSING SCANNER
The first thing to decide when beginning with scanning is what type of scanner you want. There are various kinds of scanners available. When choosing your scanner, there are two important features that you should look for:
Scanner Resolution
A better scanner resolution will mean a better quality scan of your photo which makes this feature really important. It’s best to look for a scanner that gives you a resolution of at least 3000 dpi.
Dynamic Range
A scanner’s Dynamic Range relates to how much detail the scanner can bring out in highlights and shadows. It’s measured on a scale of 0-4 and is usually called Dmax. Ideally, look for a scanner with at least a rating of 3.
SCANNING TIPS:
For the highest quality, set up your scanner in a dust-free environment. First, remove any dust or dirt from your photo prints with a microfiber cloth or alcohol-based cleaning wipe. It’s important that you thoroughly clean both the photos and scanner, as the scanner’s sensitive sensor will pick up even a speck of dust on the glass or on the photo.
Here are tips to how to clean the glass on your scanner safely and effectively:
Step 1: Unplug the power cord from the scanner.
Step 2: Using a soft, lint-free cloth, like a microfiber cloth, wipe off the dust from the scanner glass.
Step 3: If the glass has smudges or other contaminants, use a little bit of glass cleaner on a microfiber cloth and wipe the glass.
Step 4: Using a dry microfiber cloth, dry off any remaining moisture or residue.
Do not use any glass cleaners that contain the following cleaning agents:
Acetone, ammonia, benzene, carbon tetrachloride
The above chemicals can damage the scanner glass. Though some manufacturers suggest using isopropyl alcohol, it tends to leave streaks.
We also do not recommend using compressed air for dusting because the force of the air could end up blowing dust into the edges of the scanner and end up underneath the glass, which is a lot harder to clean.
Before you scan the photos, consider the way in which you’ll organize them – by date or by event? How will the files be named? Choose a system before you scan, and organize your printed photos, negatives and slides into stacks accordingly.
Here are some tips:
Scan multiple photos at once. On an average-sized scanner bed, you should be able to scan four 4×6 photos at once, and crop them later. Some scanners even come with software that does this automatically for you. Use this method to cut down scanning time.
Select a resolution of at least 300 dpi and up to 600 dpi for photos, if you plan to order enlargements.
Take advantage of editing options. Most scanning software will allow you to crop, adjust color and brightness, remove scratches, dust and red-eye.
CHOOSING A RESOLUTION
For photo prints, 300 dpi is fine in general. To make sure you get all the details hidden in your prints, scan at 600 dpi. Scanning beyond 600 dpi will make the files bigger without giving you any additional image detail. Plus, higher the resolution, the more time it takes to scan each photo.
For slides and negatives, 2000 dpi will give you the equivalent of a 6-megapixel photo, which is good enough for most standard print sizes. If the scanner can go higher (such as 4000 dpi), take advantage of it to enable high-quality cropping.
RESOLUTION, DPI AND PPI
The resolution of a digital photo is its pixels, expressed as megapixels – the horizontal pixel dimensions multiplied by its vertical pixel dimensions.
DPI stands for Dots Per Pixel. It is a measure of the number of dots that can be placed within a 1 inch span line.
PPI stands for Pixels Per Inch. It is the digital photo’s pixels dimension divided into the size of the paper to be printed. PPI occurs only when it is printed.
WHICH FILE FORMAT?
JPEG(Joint Photographic Experts Group): Sometimes referred to as JPG. JPEG is the standard file format and compatible image format supported by almost all of today’s imaging software. Some image data is lost when the file is compressed. The amount of compression can be varied. More the compression, more data is discarded and smaller a file becomes. JPEG is great for creating smaller file sizes for uploading on the Internet, or for use with e-mail.
PROS:
- Smaller File Size: JPEG uses lossy compresion to reduce file size making its use on the Internet or creating backup CDs hassle free.
- Supported by most software and photo sharing websites.
CONS:
- Lossy Compresion: Lossy means with data loss. JPEG compression does discard some image data based on the amount of compression used.
- High Quality but not the absolute best.
- Not a good choice for editing: JPEG files use lossy compression. If you plan to edit a photo and then re-save it, you will lose some quality. It loses quality, detail and information each time you edit and re-save it.
TIFF(Tagged Image File Format): TIFF (RAW) format is the standard for most commercial and professional printing needs. TIFF format means that no image data is lost after scanning. It is a great choice for archiving images where all details must be preserved and file size is not a consideration. TIFF files are very large in size compared to JPEGs because no compression is used.
PROS:
- No Compression: TIFF files are not compressed files. This means 100% of the data captured during scanning is retained.
- Absolute best quality.
- Better choice if you plan to edit because TIFF files don’t use compression and quality is not lost each time the photo is edited.
CONS:
- Large File Size: TIFF files are much larger than JPEGs making them harder to upload or email.
- Not supported by most photo sharing websites but is supported by most software.
HOW BIG WILL MY FILES BE?
This depends on the format they are saved to. The charts below list file sizes you can expect from TIFF and JPEG files.
| 35 MM FILM SCANNING: PIXEL & FILE SIZE OF A STANDARD 35MM FRAME | ||||
| Scan Resolution | Pixel Dimensions | Megapixels | JPEG File Size | TIFF File Size |
| 2000 DPI | 2700 x 1800 | 4.8 | 2.2 MB – 3.8 MB | 14.2 MB |
| 3000 DPI | 4050 x 2700 | 10.9 | 4.3 MB – 7.1 MB | 32.0 MB |
| 4000 DPI | 5400 x 3600 | 19.4 | 6.7 MB – 10.8 MB | 56.9 MB |
| * Based on 24 bit scanning and JPEG quality of 10 using Adobe Photoshop. JPEG file sizes vary. | ||||
| 300 DPI PRINT SCANS: | |||
| Pixel Dimensions | JPEG File Size | TIFF File Size | |
| 3 X 5 | 900 x 1500 | 650 KB – 1 MB | 3.9 MB |
| 4 X 6 | 1200 x 1800 | 1.1 MB – 1.6 MB | 6.3 MB |
| 5 X 7 | 1500 x 2100 | 1.6 MB – 2.3 MB | 9.2 MB |
| 8 X 10 | 2400 x 3000 | 3.2 – 4.5 MB | 21.2 MB |
| * Based on 24 bit scanning and JPEG quality of 10 using Adobe Photoshop. JPEG file sizes vary. | |||
| 600 DPI PRINT SCANS: | |||
| Pixel Dimensions | JPEG File Size | TIFF File Size | |
| 3 X 5 | 1800 x 3000 | 2.4 MB – 3.5 MB | 15.8 MB |
| 4 X 6 | 2400 x 3600 | 3.6 MB – 5.2 MB | 25.3 MB |
| 5 X 7 | 3000 x 4200 | 4.8 MB – 6.9 MB | 36.9 MB |
| 8 X 10 | 4800 x 6000 | 9.1 MB – 14.3 MB | 84.4 MB |
| * Based on 24 bit scanning and JPEG quality of 10 using Adobe Photoshop. JPEG file sizes vary. | |||


Leave A Comment